Sep
27

evolution of a sketch
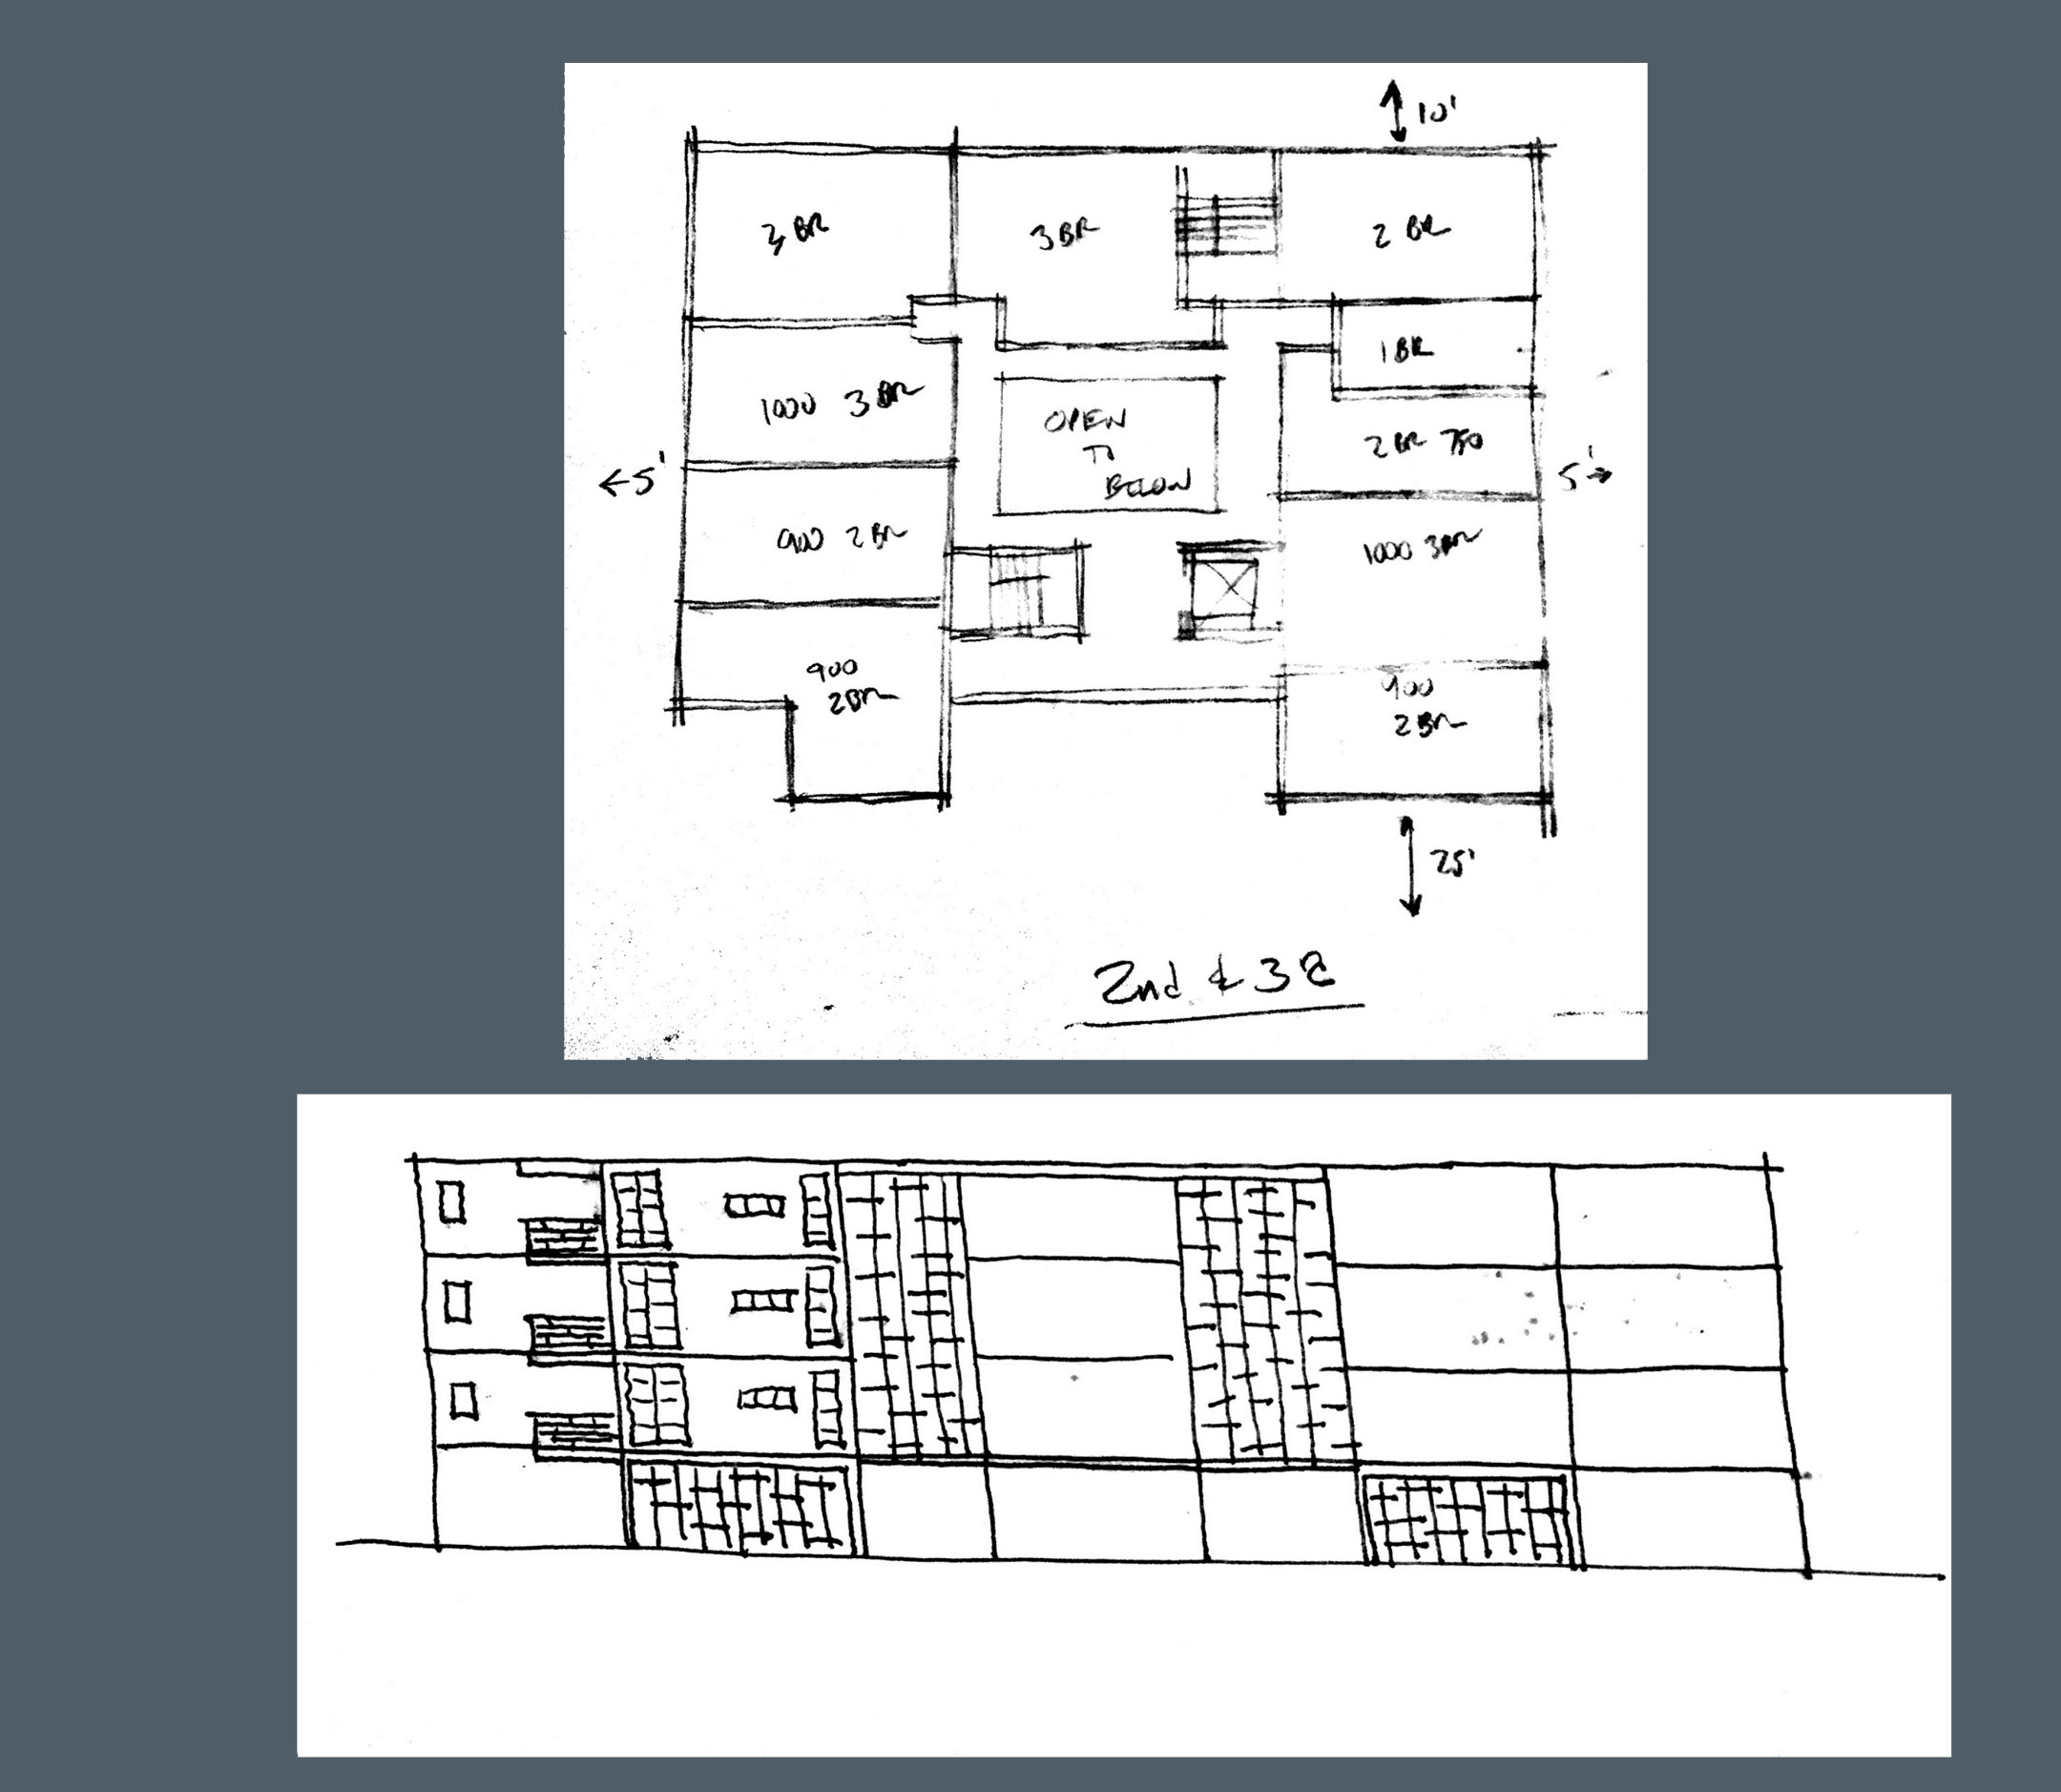
As an architect, I often work in sketchup for quick turnarounds and the ability to be able design on the fly. In this particular project- a client gave me a floor plan sketch of a potential project and a crude elevation with the lot size. I didn’t have much to work with but with a few easy changes of the sketchup model- I got the client what they wanted.
Below are the evolution of images I created to get to the final presentation-
Step 1: Decipher clients sketch and project brief. It’s a quick turnaround with an even vaguer description. Based off the sketches, I do a quick massing model in sketchup. It doesn’t have to be perfect. Its just a model and only 1 view will be eventually seen.
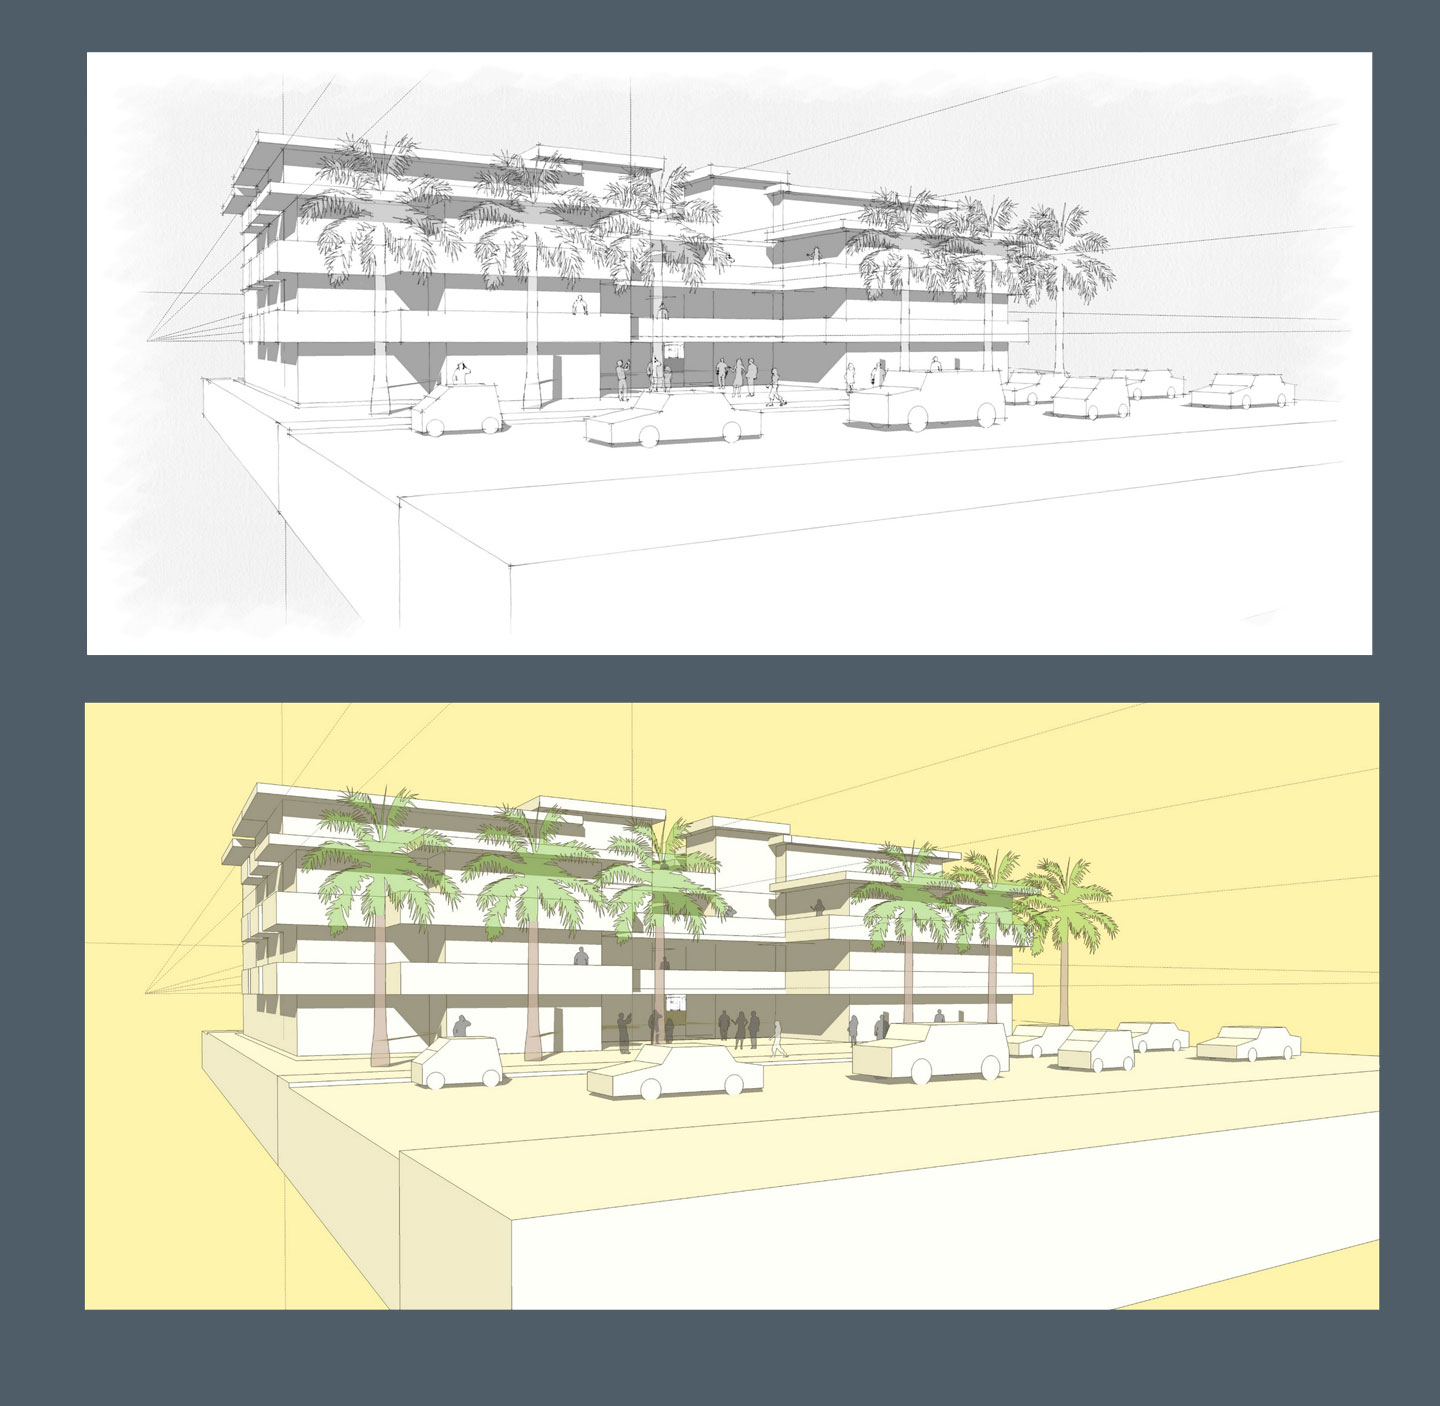
Step 2: Pick a view point that shows the best part of the building. Add site elements like cars, palm trees and people for a sense of scale and perspective. Next comes the color. Its a southern California site- so a warm fuzzy yellow to soften up the drawing even more. I send the preliminary images to the client and they are happy with the direction.
Step 3: Back and forth design changes,+ imputing client preferences on materials and colors. Site model is extended on both sides and neighboring structures are shown. These changes take a bit of time as its back and forth with the client and what they want to see.
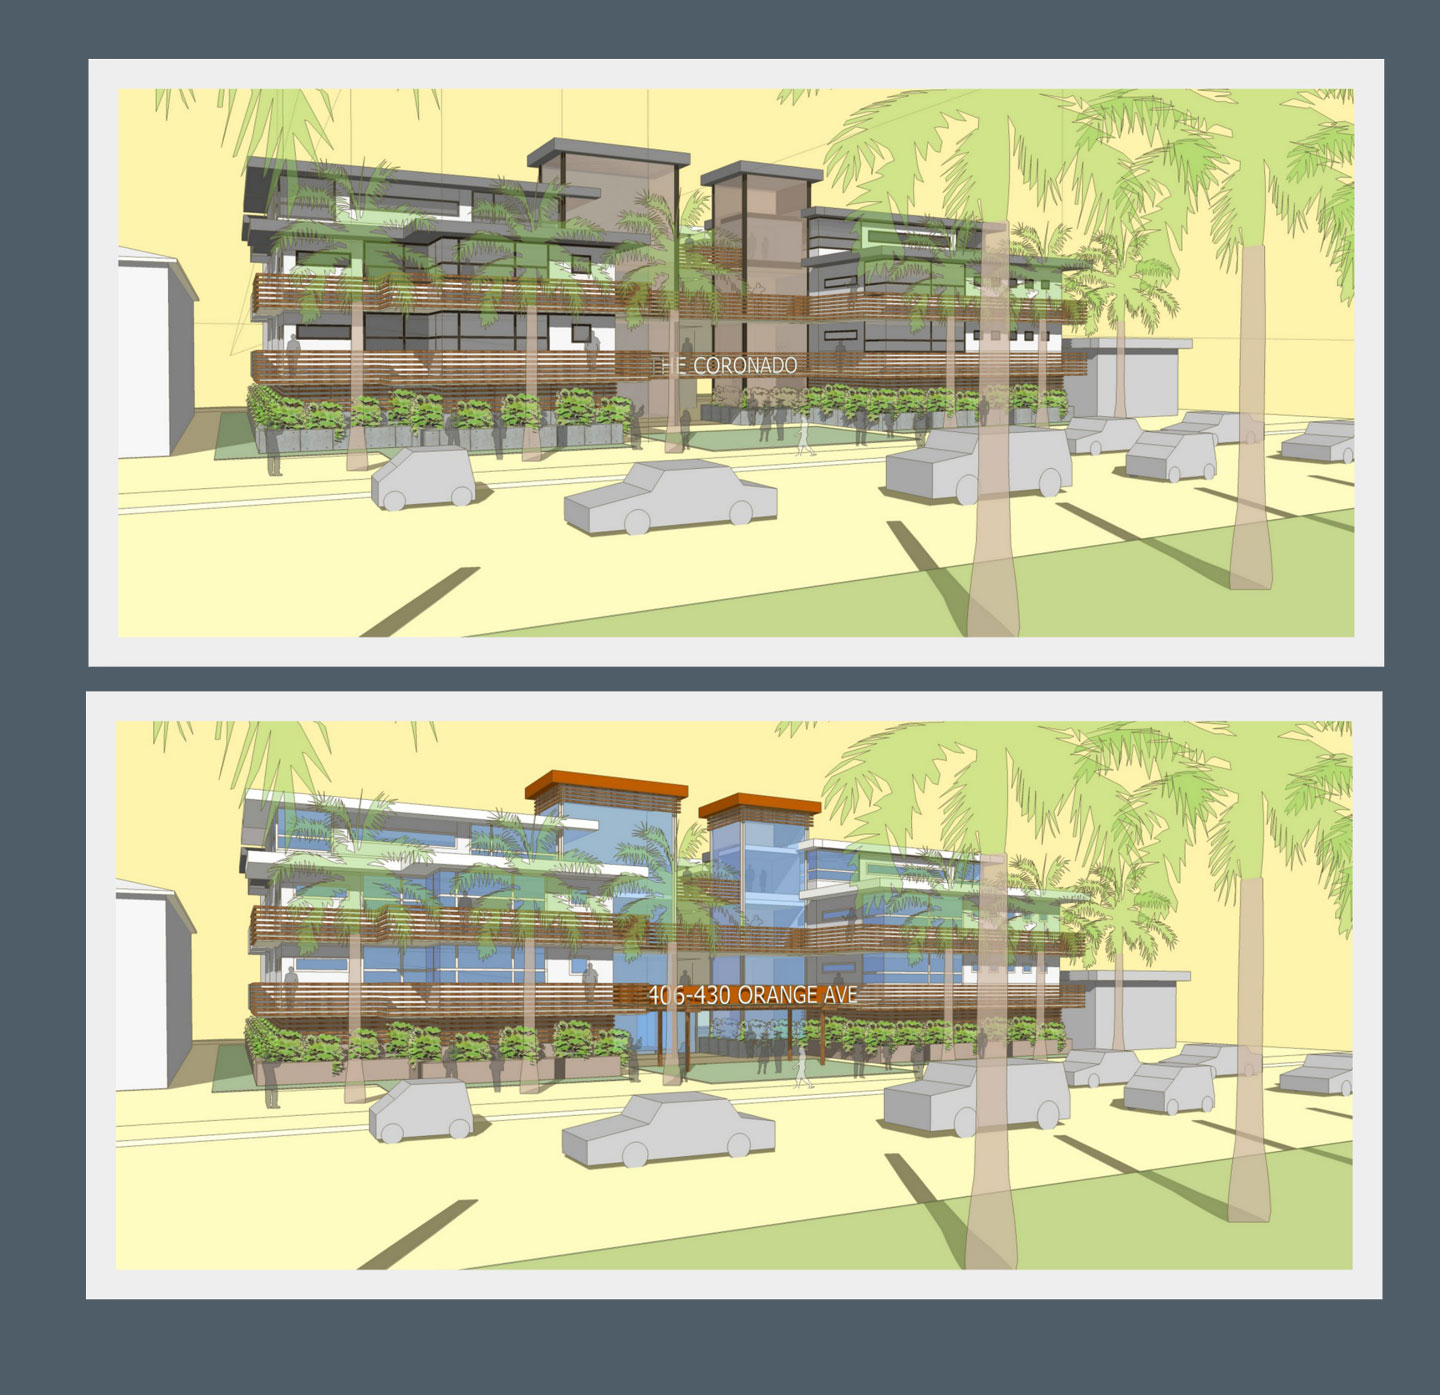
Step 4: Final design changes break down the massing even more & realistic cars replace stock cars for further detail in foreground.
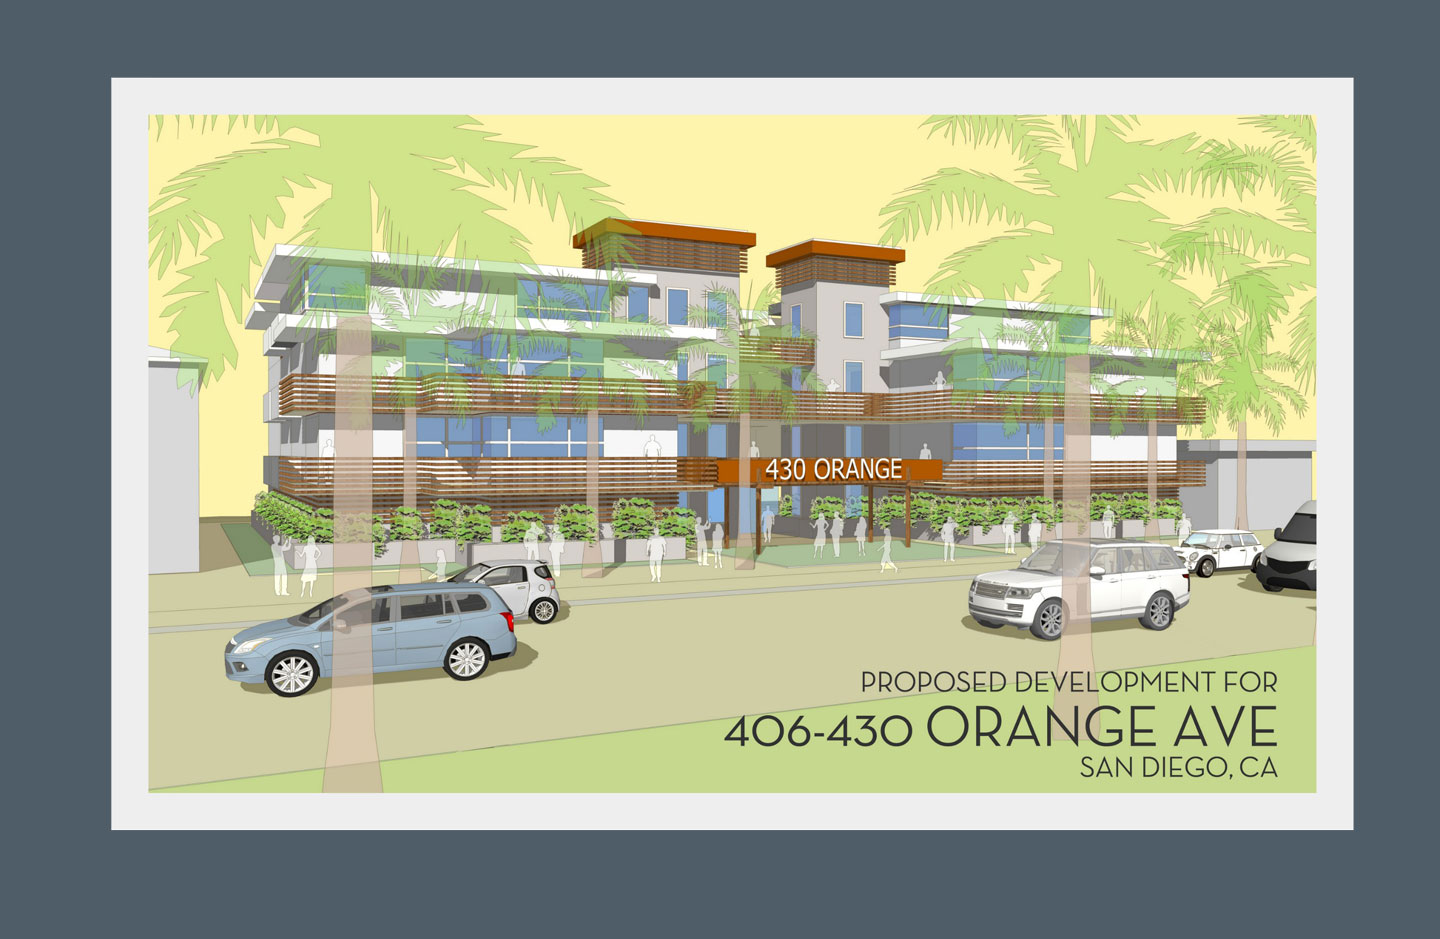
The final image gets dressed with a proper title and goes off to a happy client in less than 2 days after we started.